In this Article...
Curtain wall in Revit basically is a wall. It just use a different family type. Revit Architecture already has 3 curtain wall types. You can find them in type selector, after activating wall tool.
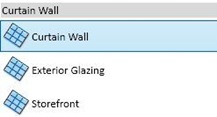
The curtain wall type is a curtain wall with single panel. We need to define the grids and the mullions after placement.
Exterior glazing and Storefront are predefined styles: they already have grids at a specified distance. Storefront even already has the mullions.
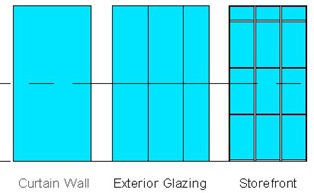
Using Exterior Glazing and Storefront
Let’s try using the curtain wall. First, create walls like below using any type of generic wall. Create it with unconnected height, 8000mm.
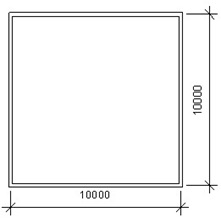
Open modify tab on your ribbon. Activate split tool.

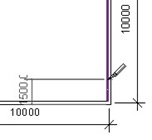
Make sure the ‘delete inner segment’ in option bar is not active. Split the walls 1500mm from each side.
Open the standard 3D view. Click the 3D view button ![]() in Revit quick launch bar. Select a wall segment in the middle and change the type to Exterior Glazing. Select another segment in the middle and change it to Storefront.
in Revit quick launch bar. Select a wall segment in the middle and change the type to Exterior Glazing. Select another segment in the middle and change it to Storefront.
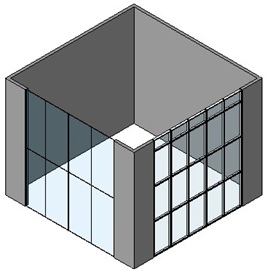
Now, let’s select the Storefront curtain wall. Activate modify tool, then move your pointer to the curtain wall. Make sure you see the tool tip saying Walls: curtain wall: storefront before you click it.
We can select 4 elements in curtain wall:
- Mullions
- Curtain wall grids
- Curtain wall panel
- The whole curtain wall itself.
Make sure we are selecting the whole curtain wall. Press [tab] to cycle between objects if you find any difficulties selecting it.
From contextual ribbon, click element properties>type properties.
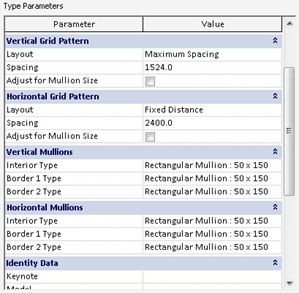
We can define the grid spacing and mullion type in this dialog. You can change the vertical/horizontal pattern and change the mullion type. Try to change the parameters and see what happen.
You can see the parameters in all curtain wall types. Not just for Exterior Glazing and Storefront.
Defining Grids
You can combine defining grids using grid pattern and manually place grids. But let’s try placing grids manually.
Change another wall with ‘curtain wall’ type. Open a elevation view so you can see the curtain wall face.
You can place horizontal grids by clicking on the vertical edge, and vertical grids by clicking the horizontal edge.
Try to create some grids like below, or something else that you like.
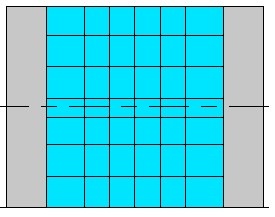
Select the vertical grid at the middle. Click add/remove segments from your ribbon.

Click the bottom most segment to remove it. Do the same to the horizontal grid until you see the grids like this.
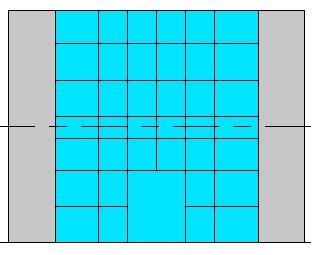
Changing a Panel with Door
We don’t place a door in curtain wall like placing a door in a ‘regular’ wall. We have to change a curtain wall panel with a door panel. Let’s load a door panel from Revit library.
Move to Insert tab in Revit ribbon, and click load family. In doors folder, find ‘M_Curtain Wall-Store Front-Dbl.rfa’ and click open.
Activate modify tool, and select the mid-bottom panel. Press [tab] several times until you can select the panel, then click your mouse.
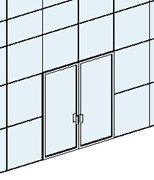
From contextual ribbon tab, click change element and select M_Curtain Wall-Store Front-Dbl from drop down list. Your panel will be replaced like this.
Placing Mullion
Placing mullion is easy. Just activate the mullion tool and select the mullion type from type selector. You may also want to try tools in placement panel.

After you satisfied with all the settings, click on the grids you want. We will start to learn creating our own type of mullions later.
Changing the Panel Materials
The last thing we are going to do is changing the material of curtain wall panel. Select the panels that covers 1st and 2nd floor.
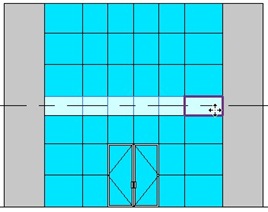
If you find some difficulties selecting them, try using filter like we did here.
Click element properties>type properties from your ribbon.
Click the ‘…’ button next to material parameter. Select glass material, then click duplicate.

Change the material to something less transparent. I use ‘Glass Dark Bronze Frosted’. We usually do this to cover the floor slab. We don’t want people see the slab, do we?
*You can purchase this tutorial compilation in an e-book. Find out the books in our E-Store .


Nice tutorial/ Concepts remain the same nearly 10 years later.
assalamualaikum mas Edo…
saya lagi ni…,
the Tutorials very help us as the students … thank you….. :)
mas edo… How to create Space Frame? and how to using it, for example to dome ?
May be you can give us the step by step Tutorials
thanks again ;)
Hi Aldri,
There are several ways to do that. But I recommend you to take a look to Revit Structure that already has some trusses library. In Revit Architecture, it is possible for us to use adaptive components to create adaptive trusses. But if you want to analyze the structure in the end, Revit structure is the better option.
Edwin,
I do recruiting and am looking for a Sr Designer for a company in the Midwest. I am trying to find someone with CATIA experience. It seems to be a rare combination in the US. Would you know of someone that could be a fit for that position?
Thanks.
Are you looking for someone in US, or someone who might interested to work in US?
I don't live in US, so I barely know people there. I don't think I can help.
I tried this method and the change element type tab does not have the door curtain door that I selected….
Hi Nyasha,
You need to load it from your family libraries first. The default template haven't load any door for curtain wall.
I am having a problem selecting the wall after placing it. I have everything turned on in visibility graphics. I try tabbing over the wall but the only thing revit allows me to select is the panel. Can someone help me out with this issue?
I figured out why I couldn't select the wall. I am working in Revit Structure and although I had walls and curtain panels turned on in visibility graphics I could not select the curtain wall only the panels. I had to change the dicipline to coordination in the view in order to select the wall.
Jerry
Thank you for the updates Jerry. I'm sorry that I haven't replied your question, because I haven't find the answer.
I believe this will help the others who have the same problem. Thanks again.