When you start to work on a large project, you probably start to think about design collaboration. You need several users work simultaneously on a project. And not having the others wait while you work. You can use Revit link, which is pretty similar with AutoCAD XREF. But Revit link works best if you have several building on your site, and link them in a master plan. But when you work on one building, using worksets is more appropriate.
The Worksets Concept
As you know, Revit work on a single project file. In any applications, you cannot open the same file if someone already open that file. You can only open it on other computer as read only, and you can’t save any changes that you make to the same file.
The idea of using worksets is dividing the project file to several worksets, and put all of the worksets in a central file. The central file is saved in a shared location (commonly a shared folder in a server) and each user can create a copy of that central file in their local hard drive. Each of the users will only open the workset that is assigned to them.
Since each user using local copy of the master file, they can work individually with the same project file and save the changes they make. But they are limited to work only on workset(s) they open.
After they’ve done, they can save the project, and update the central file. Other users can see the changes after they update their workset with the central file. Confused? You probably will. To get the concept more clearly, we are going to do a little exercise.
Simulating Multiple Users
If you have several computers with Revit installed, you can open Revit in each computer before you start using them.
If you only have one computer, you can simulate them in one machine, using multiple account. I hope your computer is powerful enough to do this. Create two more accounts from Windows control panel and give each of them password. The accounts must be password protected. Now you should have 3 Windows accounts. Refer to Windows help how you can do it if you have problem.
Open Revit normally. This session will act as you, the user name you use to login.
Let us open another Revit instance. Right click on Revit icon (hold [shift] then right click in Windows 7) choose run as different user. You will see a dialog box open. Type the user and password. Wait until this Revit instance is finish loading. Open another instance with the last account. Now you have three Revit instances running as three different users.
If you see a warning, simply ignore it. It will not affect this tutorial.
Defining Worksets
Now let us create a very simple project in the first user window. I simply create a box that I will use as the building shell. Now let’s pretend we have finished our shell design.
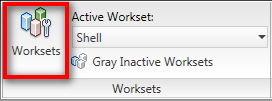
Now we are going to create several worksets. Open collaborate tab on your ribbon. Click worksets in worksets panel.
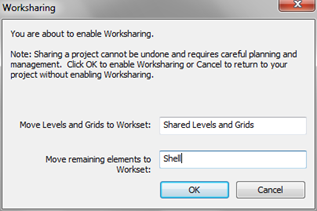
You are going to see a warning that you are enabling worksharing. Because we do want to enable it, so you don’t need to worry. Create your new workset name as shell. Then click OK.
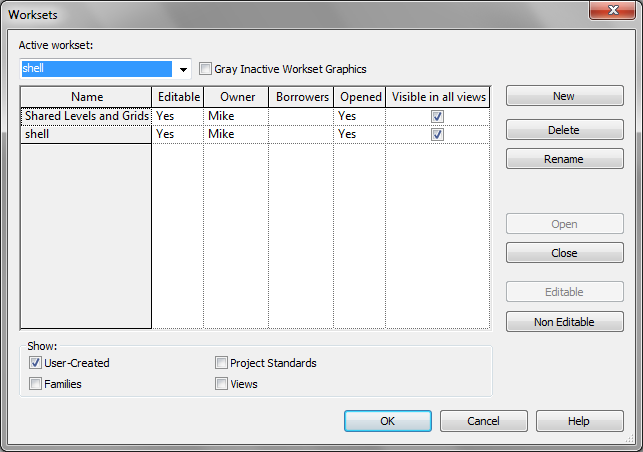
You will see worksets dialog box opened. I use Mike as the file creator, so you see Mike’s name here. Click new and create two more worksets.
Give them name level 1 interior and level 2 interior.
Now we are going to save it to central file. First time you save it, then it will be the central file. Pick a place in a shared folder or somewhere all your users can access it. Remember, if you are simulating this on one machine, do not save it in my documents folder! Your path will be hard to find by the other users. Place it somewhere in C or D drive. Something like c:\exercise.
Now we have the central file. Next, we have to release the ownership of the other worksets. Click ‘relinquish all mine’ in collaborate tab, synchronize panel.
Opening Worksets
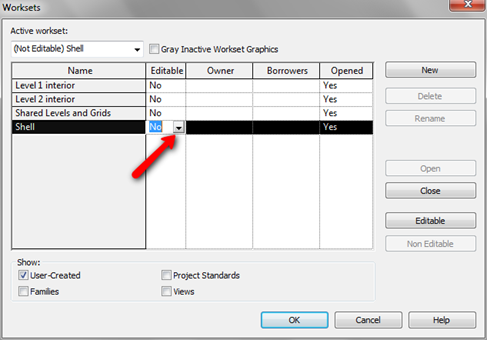
Now let us open the worksets. What we did by clicking ‘relinquish all mine’ is changing the editable setting to no. Now in your computer (or your account) change it to yes. You should see your name in owner column now.
Now move to other computer and change the editable properties to yes. You will see the workset that already edited by other user appear here. You can’t edit it when other are working on it. Open other workset.
Before you start to work on your workset, change the active workset to your workset. And activate gray inactive workset graphics to easily distinguish your workset.
Close workset dialog box. Do it in the last computer too. Now we have 3 people on 3 computers, working on the same project.
Working on Workset
Now work on your model. Let’s say my buddy Greg has develop level 1 interior. After he has done, he need to submit his updated design to the central file. He need to click synchronize with central to submit the changes.
Now the central file has been updated. But the other users still don’t see the changes. After the synchronization finished, the other users have to click reload latest to see the changes. Will there be a pop up or a message mentioning something has changed? Unfortunately no. There is a plugin that does that, but you need to download it. And it’s only available for subscription customer. Find the Revit extension named worksharing monitor.
I believe now you get the idea how design collaboration works in Revit. We will discuss a bit more about workset later.


You do not need to have 4 worksets to have 4 users active
in the file. The way that work sharing works is actually pretty simple. It
creates a copy of what is called the "Central File" on each users
local C: Drive. There are no limits on the amount of local files created. Each
user works on there local file and periodically they do what is called a "sync to
central." This takes each users individual data and loads it into the Central
file. Additionally any data that has been updated by other local users is then copied
down to your local file. It is also important to note that even without the Sync process each Revit Componet is communicating with the Central file over your server connection. This is helpful on the off chance that you try to adapt something that someone else has already moved. Revit will notify you that change has occured and will ask that you sync with central to recieve the modified change prior to allowing you to adjust the element.
You could have 2 worksets and hundreds of local users
without any issues, however your model may lack some of the separation you
desire. I typically recommend users separate worksets by discipline to start
and then as you become more familiar with the process you can expand their use.
I must insist though that you do not use worksets like layers. That last thing
you want to do is have a workset for every component in the project.
So if 4 people want to work on the file, do I need to have 4 worksets? We have been working on a file with 4 people with only the default worksets "Shared Levels and Grids" and "Worksets 1." If I create more Worksets what are the advantages? Does it not just give more limitations?
Lucien,
Yes. No program allows multiple users to work on one file. What happen if you open a shared Excel document, while someone else already opened it? You only can open it as read only.
You have to break it down to smaller pieces, so you can work on it simultaneously. Basically what we do here is giving each user their own file, based on master file.
help